Reconstitution 101: How to Mix Peptides Safely
Table of Contents
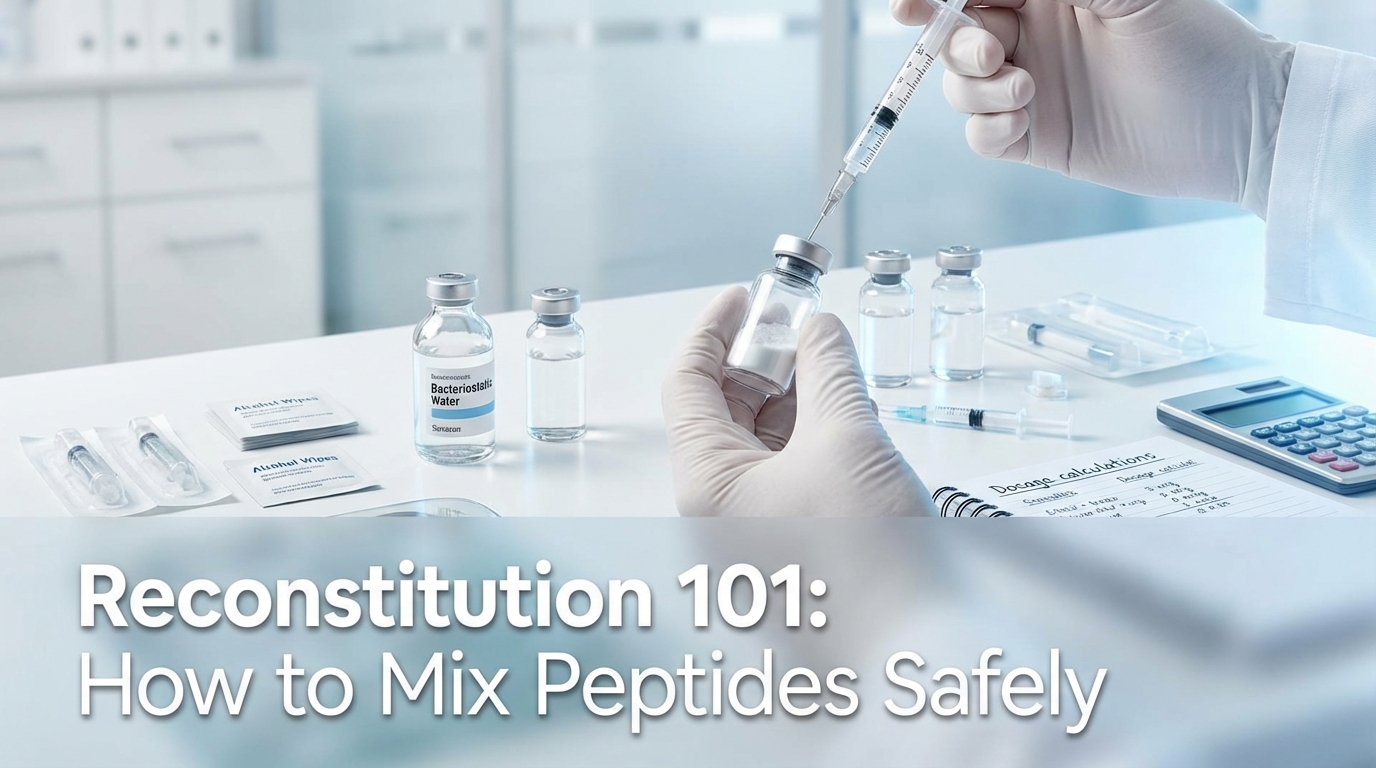
Reconstitution 101: How to Mix Bacteriostatic Water with Lyophilized Peptides
Opening a package of lyophilized peptides for the first time triggers a cascade of questions: Why does this $200 vial contain nothing but white powder? What happens if the needle enters at the wrong angle? How does anyone calculate dosages without a pharmacy degree? The intimidation makes sense—peptide reconstitution sits at the intersection of chemistry, sterile technique, and precision dosing, yet most users attempt it on kitchen counters with minimal guidance beyond a three-sentence instruction sheet.
The stakes are higher than mere confusion. A 2019 CDC analysis of multi-dose vial contamination found that improper mixing techniques and storage violations accounted for substantial non-sterile compounding errors in outpatient settings. When bacteriostatic water meets lyophilized powder, the process isn't simply "add liquid and shake." It's a controlled chemical reconstitution where vacuum pressure, shear stress on protein chains, and benzyl alcohol preservation dynamics all determine whether the final solution remains stable or degrades within days.
This guide takes a compounding pharmacist's approach to home reconstitution. It explains not just the mechanical steps but the underlying science of why vacuum control prevents powder destruction, how benzyl alcohol interacts with bacterial cell walls to extend vial life, and what visual cues distinguish normal dissolution from contamination. You'll learn to create functional sterility in non-clinical environments, master the concentration mathematics that prevent dosing errors, and recognize the sensory signals—the syringe plunger resistance, the solution's clarity, the subtle "pop" of pressure equalization—that indicate proper technique. The process demands respect, not fear. Precision follows understanding.
Why Peptides Arrive as Powder: The Science of Lyophilization
The first time someone opens a peptide shipment, confusion often sets in. Instead of a ready-to-use liquid, there's a tiny puck of white powder at the bottom of a glass vial. This isn't a shipping error or an incomplete product. It's freeze-dried peptide, preserved through a process called lyophilization.
Lyophilization removes virtually all water from the peptide compound while keeping it frozen. This prevents the molecular breakdown that would occur in liquid form. Studies in the Journal of Pharmaceutical Sciences confirm that removing moisture significantly inhibits hydrolysis and degradation pathways, ensuring long-term stability. Peptides are chains of amino acids that can degrade when exposed to moisture, light, or temperature fluctuations. In powder form, they remain stable for months or even years when stored properly.
The process works by freezing the compound to extremely low temperatures, then placing it in a vacuum chamber. The ice crystals sublimate—transforming directly from solid to gas without becoming liquid. What remains is a shelf-stable powder that weighs a fraction of its original mass. This also explains why shipping costs stay reasonable despite the fragile nature of the product.
Once lyophilized, peptides must be reconstituted before use. This means adding a precise amount of liquid to return the compound to its active, injectable form. The powder doesn't "activate" when mixed—it simply dissolves back into solution. But the water used for this process matters significantly. Tap water or distilled water from the grocery store introduces contamination risks that can destroy the peptide or cause infection. Only pharmaceutical-grade sterile solutions should contact the powder.
Understanding why peptides come freeze-dried helps explain the careful handling they require. The same molecular fragility that necessitates lyophilization also demands gentle reconstitution technique. Rough handling during mixing can break the amino acid chains just as effectively as leaving them in liquid form for months. The powder form is protection, not permanence.
Bacteriostatic vs. Sterile Water: The Critical Chemistry
The choice between bacteriostatic water and sterile water determines how safely a reconstituted vial can be used over time. This isn't a minor detail. It's the difference between a multi-use vial that stays safe for weeks and a single-use solution that becomes a contamination risk within hours.
Bacteriostatic water contains 0.9% benzyl alcohol as a preservative. According to the NIH DailyMed database, this pharmaceutical-grade alcohol disrupts bacterial cell membranes, preventing microorganism growth inside the vial. Every time a needle punctures the rubber stopper, it creates an opportunity for airborne bacteria to enter. The benzyl alcohol acts as a chemical defense system, killing any bacteria that slip through during multiple entries over days or weeks.
Sterile water, by contrast, contains no preservatives. It's pure H2O that has been filtered and sterilized. The moment air or a non-sterile surface contacts it, bacteria can begin multiplying. The CDC explicitly warns that single-dose vials lacking preservatives carry significant contamination risks if used for multiple patients or over time. This makes sterile water appropriate only for single-use applications where the entire vial contents will be drawn and used immediately. For research involving small daily doses over extended periods, sterile water creates unacceptable infection risks.
The 28-day rule exists because of bacteriostatic water's limitations. USP <797> standards on compounded sterile preparations mandate that multi-dose vials be discarded 28 days after the initial puncture unless the manufacturer specifies otherwise. Even with benzyl alcohol present, repeated needle punctures and time allow gradual contamination. After 28 days, the preservative's effectiveness diminishes. Regulatory bodies recommend disposal at this point, regardless of how much solution remains unused.
Some peptides are incompatible with benzyl alcohol due to chemical interactions that cause precipitation or degradation. These compounds require sterile water and immediate single-dose use. Always verify compatibility before choosing a reconstitution solution. The wrong choice can ruin an expensive vial before the first dose is even drawn.
Essential Supplies: Beyond Just the Vial and Syringe
Proper reconstitution requires specific tools, not generic household items. Using the wrong supplies introduces contamination risks, dosage errors, and wasted product. Each component serves a distinct purpose in maintaining sterility and accuracy.
Insulin syringes are the standard for both drawing bacteriostatic water and reconstituting peptide vials. The 1mL (100-unit) size with permanently attached needles prevents dead space where liquid can be trapped and lost. Comparative studies on syringe dead space show that detachable needles can retain significantly more fluid than integrated insulin syringes, leading to drug wastage. For reconstitution specifically, needles between 25-27 gauge work best. Larger gauges (lower numbers) can "core" the rubber stopper, creating tiny rubber particles that contaminate the solution. Smaller gauges (higher numbers) create excessive pressure that can blast the powder when water enters the vial.
Alcohol prep pads must contain 70% isopropyl alcohol, not hand sanitizer or household rubbing alcohol. CDC injection safety guidelines emphasize that 60-90% alcohol solutions are most effective for skin and vial preparation. The 70% concentration is specifically formulated to denature proteins in bacterial cell walls while evaporating slowly enough to kill microorganisms. Higher concentrations evaporate too quickly to be effective. Each vial top requires a fresh alcohol pad before every needle insertion, not a quick wipe with a reused pad.
A clean, non-porous work surface is essential. Kitchen counters work if properly sanitized with disinfectant and allowed to dry completely. Fabric surfaces, cutting boards, and wooden tables harbor bacteria in their pores that alcohol can't reach. The workspace should be away from open windows, ceiling fans, or HVAC vents that create airflow. Even gentle air movement can carry dust particles and microorganisms onto sterile supplies during the critical moments when vials and needles are exposed.
Gloves are optional but recommended, especially for those with pets or skin conditions. Bare hands that have been washed thoroughly with soap are acceptable if they don't touch the needle or vial opening. The goal is reducing contamination vectors, not achieving surgical-suite sterility.
Mastering "Peptide Math": Dosage & Dilution Without the Guesswork
Here's the single concept that unlocks every reconstitution calculation: Concentration = Mass ÷ Volume. That's it. Every dosage question traces back to this formula. The anxiety around "peptide math" usually comes from unfamiliarity, not actual difficulty. Once the logic clicks, it becomes as routine as reading a nutrition label.
Start with what you know. The vial's label states the total mass of peptide inside, typically in milligrams. You choose how much bacteriostatic water to add. That choice determines concentration. For example, adding 2 mL of water to a 10 mg vial creates a concentration of 5 mg/mL. Adding 1 mL instead yields 10 mg/mL. Neither is "correct" by default—the right volume depends on the dose size being measured and the syringe graduations available.
The "Rule of 10" shortcut simplifies things for the most common scenario: a 10 mg vial. Add 1 mL of bacteriostatic water, and every 0.1 mL (10 units on a standard insulin syringe) equals exactly 1 mg. Add 2 mL, and every 0.1 mL equals 0.5 mg. This mental framework eliminates calculator dependency for standard vials and common dose ranges.
Now, the detail most guides skip entirely: syringe dead space. Every standard syringe retains a small volume of liquid trapped in the needle hub and the tiny gap between the plunger and the needle seat. This "dead volume" ranges from 0.04 mL to 0.08 mL in conventional syringes. That sounds trivial. It isn't—not when working with doses measured in micrograms. Over 30 injections from a single vial, dead space losses can consume 1.2 to 2.4 mL of reconstituted solution. That's potentially an entire vial's worth of peptide wasted.
Low-dead-space (LDS) syringes reduce this loss by up to 90%. Research published in Drug and Alcohol Dependence highlights that LDS equipment preserves significant medication volume compared to high-dead-space equivalents. They feature a redesigned hub where the needle seats flush against the plunger mechanism. For anyone administering doses below 0.5 mg, switching to LDS syringes isn't a luxury—it's a practical necessity for accurate dosing. When calculating how many doses a vial will yield, subtract estimated dead space losses from the total reconstituted volume. The "real" number of usable doses is always lower than the theoretical number. Planning for this avoids the frustrating experience of running short before the vial should be empty.
Troubleshooting: Cloudy Solutions, Foam Traps, and Vacuum Mishaps
A perfectly reconstituted vial produces a solution that is water-clear. Hold it against a white background under direct light. No haze. No floating particles. No swirling wisps. Anything less than full optical clarity signals a problem that needs diagnosis before proceeding.
Cloudiness that appears immediately after adding water usually indicates one of two things. The water may have been directed straight onto the powder cake with too much force. This can cause localized over-concentration where peptide molecules aggregate faster than they dissolve. The fix is patience—set the vial upright on a flat surface and wait 5 to 10 minutes. Then roll it gently between your palms. Most aggregation from turbulent mixing resolves on its own. Second possibility: the bacteriostatic water may have been stored improperly or expired. Benzyl alcohol degradation products can occasionally react with certain peptide sequences, producing visible particulate matter. If cloudiness persists after 20 minutes of gentle periodic swirling, don't use the vial.
Foam is different from cloudiness—and far more common. Peptides are surface-active molecules. They migrate to air-liquid interfaces and stabilize bubbles, much like soap does. A thin layer of foam after swirling is expected and harmless. It dissipates within minutes if the vial is left undisturbed. The danger is mistaking persistent foam for incomplete dissolution and then shaking the vial aggressively to "fix" it. Vigorous shaking introduces shear stress—mechanical force that can physically unfold peptide chains and permanently destroy their three-dimensional structure. A study in Biotechnology and Bioengineering demonstrated that agitation-induced shear stress at air-liquid interfaces is a primary cause of protein denaturation. A denatured peptide may appear fully dissolved while being biologically inactive. There's no visual test for denaturation. Prevention is the only strategy.
Vacuum mishaps deserve special attention. Some vials contain strong negative pressure from the lyophilization process. When piercing the stopper, this vacuum can violently pull the syringe plunger downward, injecting all the water at once in a high-pressure stream directly onto the fragile powder cake. To prevent this, use a controlled entry technique: pierce the stopper with the needle only—don't yet depress the plunger. Allow ambient air to slowly equalize through the needle bore for 3 to 5 seconds. Then attach or engage the filled syringe and add water at a controlled pace, aiming the stream against the glass wall rather than the powder.
Storage and Stability: Why the 28-Day Rule Exists and When It Bends
The moment bacteriostatic water enters a lyophilized vial, a biochemical countdown begins. Peptides in dry powder form can remain stable for months or years at controlled temperatures. In solution, degradation pathways activate immediately. Hydrolysis starts cleaving peptide bonds. Oxidation targets vulnerable methionine and cysteine residues. Deamidation slowly alters asparagine side chains. Refrigeration slows all of these reactions dramatically, but it doesn't stop them.
The widely cited 28-day rule originates from USP <797> guidelines governing multi-dose vial usage in clinical settings. This isn't an arbitrary number. It reflects the validated antimicrobial effectiveness period of 0.9% benzyl alcohol under reasonable storage conditions. After 28 days, the preservative's ability to suppress microbial growth in a repeatedly punctured vial can no longer be guaranteed. Each needle insertion introduces a microscopic pathway for contamination. Twenty punctures over four weeks create twenty potential breach points in the stopper's integrity.
Here's the nuance most articles miss: the 28-day limit addresses microbial safety, not chemical potency. Some peptides degrade in solution well before 28 days. Others remain chemically stable far longer. The actual potency window depends on the specific peptide's molecular vulnerability, the storage temperature, light exposure, and pH of the solution. For instance, peptides containing tryptophan residues are particularly sensitive to light-induced oxidation and may lose measurable activity within two weeks even when refrigerated. Meanwhile, smaller, more chemically stable sequences might retain full potency for 30 days or more under identical conditions.
Practical storage rules that go beyond the basics: always store reconstituted vials upright in the refrigerator at 2–8°C (36–46°F). Never store them in the refrigerator door, where temperature fluctuates with every opening. Keep vials in an opaque container or wrapped in foil to block light. Label each vial with the reconstitution date, the peptide name, and the concentration—memory is unreliable across multiple vials over weeks. And critically, never freeze a reconstituted peptide solution. Ice crystal formation can physically shear peptide chains apart through a mechanism similar to aggressive shaking, causing irreversible structural damage. Freezing is only appropriate for unreconstituted lyophilized powder.
The "Kitchen Counter Pharmacy" Framework: A Realistic Sterility Model
Most reconstitution guides borrow their language from pharmaceutical clean rooms. They reference ISO Class 5 environments, laminar airflow hoods, and gowning procedures. This creates a paradox. The reader knows they're standing in a bedroom or kitchen, not a compounding pharmacy. The gap between the ideal and the reality breeds either paralysis or recklessness—people either refuse to start or they abandon sterile technique entirely because "perfection is impossible anyway."
A more honest model borrows from field medicine and harm reduction. Think of it as a three-zone system.
Zone 1: The Critical Zone. This is the six-inch radius around the vial stoppers and needle tips. Nothing unsterilized touches this zone. Ever. Alcohol swabs are the minimum barrier here, applied with firm pressure for a full five seconds—not the quick dab most people default to. Research on alcohol contact time shows that 70% isopropyl alcohol requires adequate wet contact to disrupt microbial cell membranes effectively.
Zone 2: The Buffer Zone. This is the immediate work surface, roughly two feet in every direction. It gets wiped down with alcohol before any supplies are unpacked. Ceiling fans get turned off. Pets leave the room. Windows close. The goal isn't sterility—it's reducing the density of airborne particulates settling onto exposed surfaces. Studies on household bioaerosol concentrations show that simple interventions like disabling forced air circulation can reduce airborne colony-forming units by a meaningful margin.
Zone 3: The Room. This is everything else. It doesn't need to be sanitized. It just needs to not actively generate contamination. That means no cooking, no sweeping, no folding laundry while vials sit open. Common sense, applied consistently, outperforms theatrical sterility applied sloppily.
This framework replaces the false binary of "clean room or nothing" with a graduated, practical model anyone can execute in a real living space.
The Shear Stress Misconception: Why "Gentle" Isn't Just About Speed
The universal instruction is simple: swirl, don't shake. But almost no guide explains what actually happens at the molecular level when a peptide is subjected to agitation—or why some peptides tolerate rough handling while others fall apart.
Peptides are chains of amino acids held in specific three-dimensional shapes by weak bonds: hydrogen bonds, van der Waals forces, and hydrophobic interactions. Vigorous shaking creates air-liquid interfaces—tiny bubbles. At the surface of each bubble, peptide molecules get pulled and stretched between the water phase and the air phase. This is shear stress. For small peptides under roughly 15 amino acids, the damage is usually negligible because there's little tertiary structure to disrupt. For larger peptides and small proteins, those weak internal bonds can break, causing the molecule to unfold and aggregate.
That aggregation is what produces visible cloudiness. It's not contamination. It's denatured protein clumping together. The peptide isn't dirty—it's destroyed.
Here's the contrarian nuance most sources miss: the swirling instruction can also cause problems if done aggressively. A hard, fast swirl in a half-full vial creates a vortex with its own air-liquid interface. The safer technique is to hold the vial at a 45-degree angle and roll it between the palms for 30 to 60 seconds. This keeps the liquid moving along the glass wall without generating foam or a central vortex. If undissolved particles remain after two minutes of gentle rolling, the vial can be placed upright in the refrigerator for 15 minutes. Cold temperatures slow molecular motion and often allow stubborn lyophilized cakes to hydrate passively without any mechanical force at all.
The goal is dissolution with minimal interfacial stress. Speed is the enemy of intact peptide structure.
Bringing It All Together
Reconstituting lyophilized peptides transforms from an intimidating laboratory procedure into a manageable skill once the underlying chemistry and technique are understood. The critical elements—creating a clean environment, controlling vacuum pressure during injection, avoiding shear stress through gentle swirling, and calculating accurate concentrations—form the foundation of safe peptide preparation. These protocols exist not as arbitrary rules but as protective measures against contamination, degradation, and dosing errors that could compromise both safety and efficacy.
The difference between a successful reconstitution and a ruined vial often comes down to small details: the patience to let cold components reach room temperature, the discipline to swab every rubber stopper thoroughly, and the restraint to guide water gently down the vial wall rather than blasting the delicate powder. These techniques, borrowed from compounding pharmacy standards, provide the same level of precision at home that researchers expect in clinical settings.
However, technical proficiency should never replace medical guidance. The information presented here serves educational purposes for research applications. Anyone considering peptide therapy for health optimization must work with qualified healthcare providers who can assess individual medical history, monitor for adverse reactions, and adjust protocols based on response.
Ready to explore if peptide therapy might be right for you? Take our free personalized protocol assessment to receive customized recommendations based on your specific health goals.
Medical Disclaimer: This article provides educational information only and doesn't constitute medical advice. Consult licensed healthcare professionals before beginning any peptide protocol.